
6 Best Linux Distros of 2024 & Best Coupon Codes
This article has been just updated:
![]() The Linux operating system is a very popular alternative for computer users who want to avoid the more mainstream Windows or macOS. In many cases, Linux is the preferred OS as it can be run on many different types of hardware and virtual environments, and does not require the computing resources of the large commercial operating systems. There are versions of Linux that can be run on everything from small, embedded monitoring devices all the way up through the most powerful super-computer.
The Linux operating system is a very popular alternative for computer users who want to avoid the more mainstream Windows or macOS. In many cases, Linux is the preferred OS as it can be run on many different types of hardware and virtual environments, and does not require the computing resources of the large commercial operating systems. There are versions of Linux that can be run on everything from small, embedded monitoring devices all the way up through the most powerful super-computer.
A Linux distribution is an operating system that is based on the Linux kernel. Also known as a Linux distro, it is downloaded as a number of software packages and includes additional tools and applications that extend its capabilities beyond a traditional Linux implementation. Linux distros are often easier for users to deploy since there is no need to manually compile the complete Linux OS from source code.
The most Easy one-click savings help visitors to save an average of $21 in less than 2 minutes. Using coupon codes can save you big bucks!
Dell is the prominent computer manufacturer. The company has operated for several years in technology and electronics space. The company has been the leading computer company in the market. It’s known for producing the fully functional electronic devices. The company devices are affordable you can use the Dell coupons to facilitate purchase of your most preferred Dell product.
Dior – is the distinguished company for luxury items like the Maison, Saddlebags, jewelry, fragrance makeup and the skin care products. Dior has created ultra-modern beauty products that have been used by many celebrities globally such as Jenifer Lawrence, Lupita Nyong’o and Rihanna. Follow this link https://www.coupon-karma.com/dior/ to learn about Dior sale deals.
Home Depot is a company that provides a better access to hardware and other home repair solutions to the normal homeowner. Home Depot was founded in the year 1978. This company has been the leading supporter of home maintenance, repair and the establishment of new constructions. You can find anything you want such as the best Home Depot coupon codes by shopping with this organization
Hundred of different variants of Linux are available as distributions. They may have been tailored to run in specific hardware environments or be stripped down to the essentials in order to conserve space in virtual environments. Though the individual Linux distros may have major differences in the features that they offer, there are some similarities in most Linux distributions.
A Linux distro will usually include:
The specific tools and libraries that are included in the top Linux distros are what differentiates the large number of distributions from which a user can choose. Depending on how you plan to use the distribution, you can obtain one designed for your needs. The tools and software are often included both as binary files and source code, allowing modification to further customize the operating system.
Many distributions are ready to use immediately after downloading them, though some of them do require the user to compile the source before the distro is usable. The included package management systems are used to install and uninstall software packages. They are also used to perform package searches, automatic software upgrades, and package dependency verification.![]()
The diversity of Linux distros has made it possible for you to use one of them in almost any type of computing scenario. Some distros are targeted at specific user groups by including software packages that pertain to their areas of expertise. Others might be designed to run on a specific hardware platform while others can be used on a variety of different machines. Niche distributions are available for scientists, musicians, and computer security professionals and many other specific applications. Lightweight Linux distros can be obtained that are stripped down to the essentials and intended for use in situations where storage space is at a premium.
![]() Linux is based on open-source software development. The Free Software Foundation originated the GNU General Public License (GPL) which mandates that any new software developed from free software must also be free. The Linux package which is part of the distro must be offered for free, but there are commercial vendors that charge for the additional tools and services that are included in their distributions.Some distributions can be obtained in a free version and also have commercial grade variations which include vendor support.
Linux is based on open-source software development. The Free Software Foundation originated the GNU General Public License (GPL) which mandates that any new software developed from free software must also be free. The Linux package which is part of the distro must be offered for free, but there are commercial vendors that charge for the additional tools and services that are included in their distributions.Some distributions can be obtained in a free version and also have commercial grade variations which include vendor support.
With the wide variety of Linux distros to choose from it can be confusing to select the right one. Not all distros are created equally. Here are some factors to consider when making your choice.
Here is an overview of some of the best Linux distros.
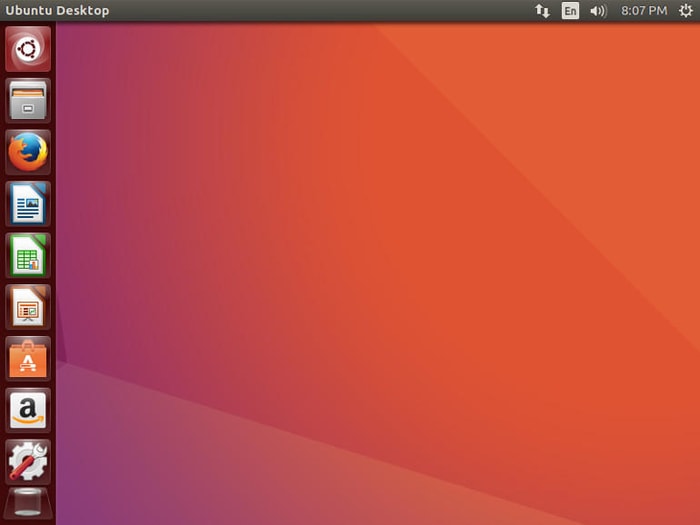
Ubuntu is one of the most popular Linux distros. It is very accessible and is one of the recommended distros for those users new to Linux. New versions are released every six months and are supported for one year. Long-term support versions are released every other year by the developer which guarantee five years of security and maintenance upgrades. This allows for more stability in your computing environment.
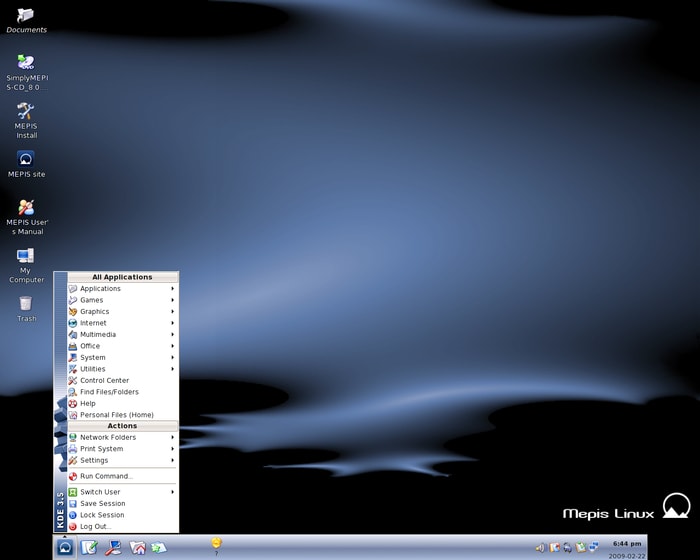
Here is another Linux distro that was originally based on Debian packages. The first release was in May 2003 and in 2006 the developers made the switch from Debian to Ubuntu packages and repositories. It was created by Warren Woodford as an alternative to other distributions that he considered to be too complicated for the average user. SimplyMEPIS is the standard version that is meant to be run on computers with a reasonable amount of storage and computing power. A variant of MEPIS called AntiX can be run on older and less powerful machines. The OS can be run directly from a CD in case of a hard drive crash.
RHEL is a commercial Linux distro that includes a suite of office applications and the capability to use virtualization techniques to run Microsoft Windows and other legacy programs. It is widely used in corporate settings and the full support that is available makes it more palatable to some IT managers than the prospect of reaching for help in online forums. If you are planning on a desktop implementation of Linux, RHEL might be just what you need.
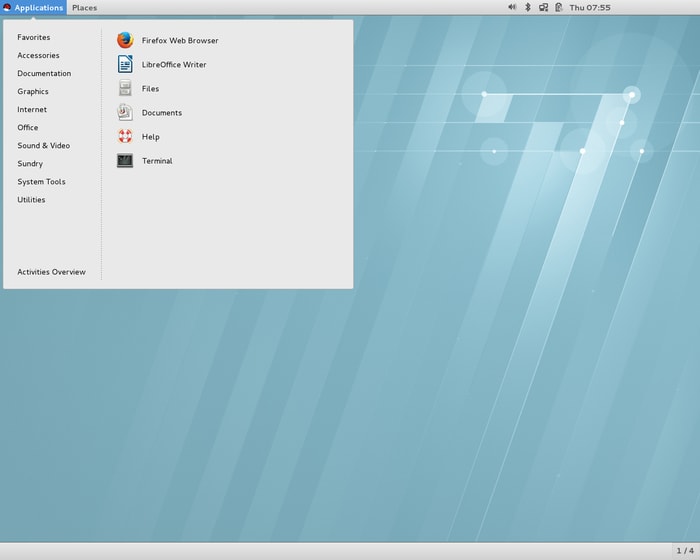
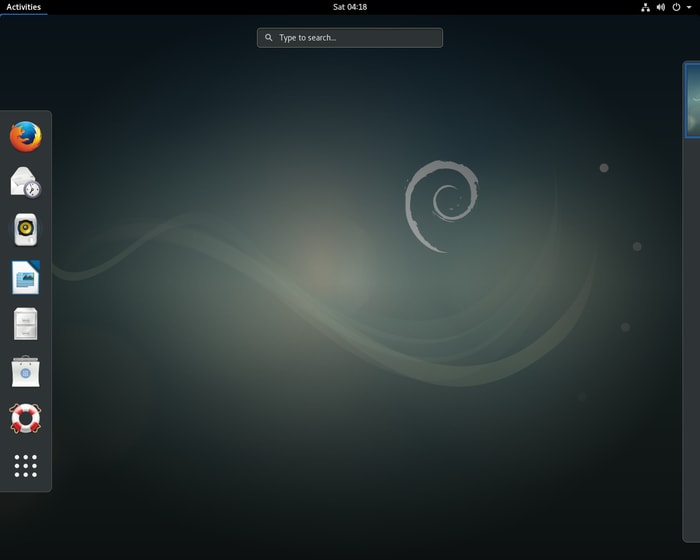
Debian has been around since 1993 and has the reputation as one of the most well-tested Linux distros. Debian provides the foundation on which Ubuntu is built, but is not as friendly for use by Linux novices. It is completely open-source which can pose some problems with peripheral device compatibility. New, stable releases are produced and released about every one to three years.
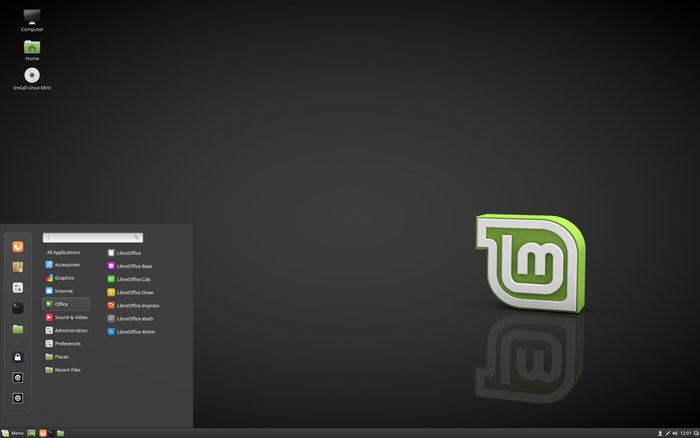
Users making the switch from Windows or macOS will find Linux Mint a great choice in a Linux distro. It includes the popular LibreOffice software suite and allows for substantial customization. The Timeshift feature enables the user to use snapshots to restore their computer back to a previous point in time.
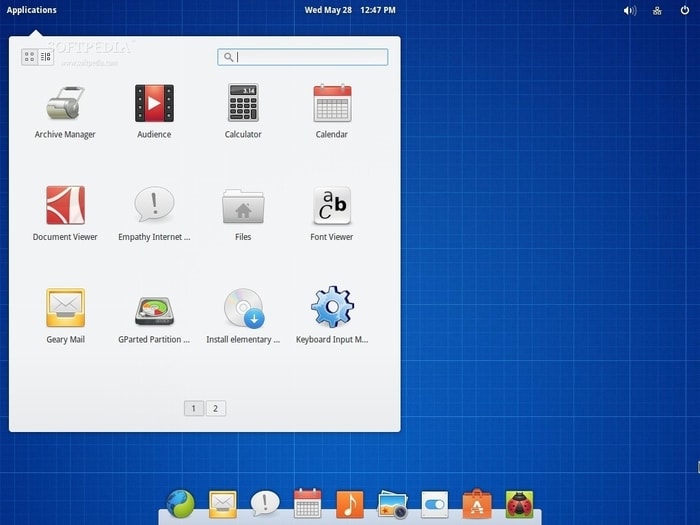
Users of Elementary OS will be immediately impressed by its intuitive user interface. It holds a strong appeal for those users who want to investigate Linux as an alternative to their Windows or Mac systems. It is a great choice for novice Linux users but offers less customization that some other distros. Users familiar with the macOS will find many similarities in the look and feel of Elementary OS.
As you can see, there are many options available to you when choosing a Linux distribution. Your level of Linux experience, the hardware platform you intend to use, and the degree of customization that you desire are all factors that should go into your final decision. There is a distribution that will fit your needs and allow you to take the plunge into the world of Linux with a minimum of issues.